Wednesday, April 7, 2010

i'm getting hungry . . .

Thinking about all the different felt foods I'm going to be making this month for my ninth craft till Christmas is making me hungry.  I'm expecting to gain at least five pounds this month.  Maybe I should have went with a felt board instead of felt food.  Too late now . . . I'm already hooked.  I know that there are A LOT of great tutorials out there for felt foods.  I've been super inspired by One Pretty Thing's Felt Food Round-up, but I'm going to experiment a bit with my own ideas before I revert to using these fabulous tutorials.  If you are looking for one great site for felt food, I recommend checking out Polly's Helping Little Hands and her felt food cook-along.  Polly also gives step-by-step instructions for making this delicious looking pizza pictured below.  Are you getting hungry yet? 
Eat up and . . .
craft on!

Monday, April 5, 2010

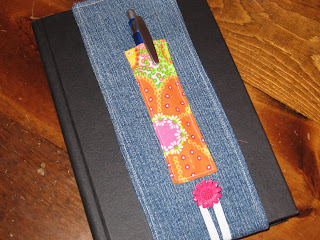
make it: your own page and pen holder


I know . . . I know . . . I'm supposed to be working on my ninth craft till Christmas.  I had the best of intentions of posting about which felt craft I decided to work on throughout April. (Thanks so much to those who offered their input!)  But . . . then last night I lost something, and I decided enough is enough.  You see, I am really good at misplacing things . . . keys, papers, socks, the TV remote, my children. (Well, that's not true.  I've never misplaced my children, but it's not for lack of trying.)  If I had a tally for the most often misplaced item it would without a doubt be pens, pencils, highlighters, any sort of writing utensil.  (Michael, if you are reading this, stop laughing!)  For me, the most frustrating moment to lose a pen is when I'm reading a book and need to underline a quote or passage that I'm going to want to reference later.  This has been an annoying problem since college when I spent large amounts of time looking for pens and highlighters so that I could study. 

Last night I had enough!  So tonight I came up with a solution to my problem in this cross between a page-holder and a pen-holder.  Check it out and make one for an avid reader, college student, friend or co-worker in your life who is always looking for a pen. 

The best part about this project is that it uses supplies you probably already have on hand:
  • 2 - 11 x 3.5 inch rectangles of fabric (You may want to vary the length depending on the size of book you are hoping to use this for.  These measurements will work for a book from 7 to 10 inches in length.)
  • 1 - 4 x 2  inch rectangle in a contrasting color
  • 1 button or 2 if you want to try to make this for very different sized books
  • 1 - 23 inch strip of thin elastic
1)  Take 4 x 2 piece and fold in 1/8 inch so that wrong sides are touching on both long sides and one short side.  Iron.  Double fold remaining short side and iron.

2)  Sew the edge of the double folded side.

3) Sew three sides of small piece on the top 11 x 3.5 piece leaving the double fold side open at the top.  This is the pen holder.

4)  Sew button on below pen holder.

5)  Fold the elastic and sandwich it in between the two 11 x 3.5 right sides together.  Sew around outside edge leaving an inch or two open to turn.

6)  Clip corners and trim edges. 

7)  Turn so that right sides are facing out.

8)  Fold in opening and sew around edge closing open as you go.

9)  Grab a good book, your favorite pen and start reading.
Craft on!
  
Beyond The Picket Fence


Sunday, April 4, 2010

sunday kids' craft: april showers bring spring flowers


Well, it's April and the girls and I are tired of waiting for the flowers to bloom, so today for our Sunday craft we made our own with random supplies we found in the craft cupboard.  These flowers are the perfect craft to make with really young crafters because they are super easy and they can be done with a two-year-old's short attention span.

Grab the following stuff and make your own:
  • newspaper to cover the work surface - We did not do this . . . don't make the same mistake!
  • coffee filters
  • paint or markers (We used dot-to-dot paint markers.  If you have a two-year old that you are teaching to craft, these are a MUST - no paint brushes, no water cups, minimal paint on clothes!)
  • buttons, circles cut out of foam, puff balls or anything in reach that is circular
  • tongue depressors or craft sticks
  • craft glue
1)  Let kids paint/decorate their coffee filters.  If you use paint or dot-to-dot paint markers, you will want to let the coffee filters dry for a few minutes.  Dot-to-dot paint markers dry super fast - another plus!

2)  (If working with super young crafters, you may want to do this part.)  Gather up a few centimeters of the center of the filter and squirt glue onto this gathered center.  Place button, foam circle or puff ball on glue.  Let dry while you do the next step.


3)  Paint tongue depressors/craft sticks green or use markers to color green.


4)  Put glue on one end of the green stick, and place coffee filter flower onto glue.  Press tightly with fingers or with heavy object until dry.

5)  Enjoy your beautiful spring bouquet!


The best part about this craft is that it was so quick and easy the kids still had some crafting left in them.  We painted freestyle with the dot-to-dot paint markers.  The girls created some beautiful Easter eggs.


Happy Easter and . . .
craft on!

Thursday, April 1, 2010

HELP!

Well, it's April 1.  You know what that means.  Okay, maybe you don't know what that means, so I'll tell you . . . the beginning of a new month means the beginning of a new craft.  I'm waffling between felts foods, a felt playhouse, felt slippers or a felt board.  Are you sensing a theme?   

I have a stockpile of felt that I would like to start giving new life so it doesn't just sit around, but I just can't decide between these four fun ideas.  I'm crazy busy for the next few days, so I won't be starting anything new until after Sunday.  That leaves me four days to decide.  Help me . . . pleeeeaaase!  Leave a comment below and vote for which one you think I should do.  If no one comments, I'll be left to my own devices . . . yikes!  

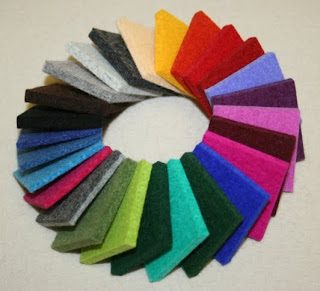
In the mean time, go pick up your own felt rainbow from your local craft store and . . .
craft on!
   
Related Posts with Thumbnails