Showing posts with label ninth craft till christmas. Show all posts

Saturday, May 1, 2010

a farwell to felt food

Well, it's not a complete farewell . . . it's more of a "see you in a couple of weeks".  But the end of April brought with it the end of my ninth craft till Christmas - all foods felt.  However, I do plan to keep dabbling in felt food creation because I didn't quite get as far as I was hoping.  Here's a sampling of what I managed to eek out in 30 days . . .

I was hoping to make some Sun Chips, veggies, pizza and the fixings.  I think my downfall was the bread.  I spent a ridiculous amount of time on that silly bread, and therefore, I didn't have much time for anything else.  My favorite thing to make was definitely the strawberries - soooo cute and incredibly easy. 

Used an object to trace circles and cut them out.

Fold circle in half and cut 2 half circles.

Fold half circles in half and sew along open edge.

Flip inside out so that you have a cone shape.

Use embroidery thread to sew a running stitch around the opening of the cone leaving tails at the beginning and end to use for pulling shut later.  I found that embroidery thread was sturdier and more secure than regular thread.

Stuff with fabric/felt scraps or stuffing.

Pull on tail ends of embroidery thread to draw opening shut.  Tie securely.

Cut out two pointy oval shapes (ahhh . . . I'm so good at using technical terms).  I used two different shades of green.

Overlap two pointy green oval and tack on top of strawberry covering opening.

With brown embroidery thread run small stitches all over the strawberry to resemble seeds.  Hide beginning and ending knots of brown thread under leaves.

Love these!

I assumed this technique would work to make carrots.  I was wrong!  Unless, of course there is some sort of variety of short chubby carrot out there that I am not aware of.  The only difference between my carrot technique and the strawberry technique was the size of the circle I started with.  Here's the result:

Back to the drawing board.  I will be using a narrower longer triangle shape I think rather than a half circle, and I will . . .

craft on!

FYI - I will be posting about my eighth craft till Christmas in the next day or two.  True to form, I'm running behind again this month!

Thursday, April 29, 2010

felt food again: a children's lunch classic

One more day of my ninth craft till Christmas, and I suddenly went into a panic attack when I read this comment made by Polly from Helping Little Hands, "Wow! Your bread turned out fantastic! Felt food is so addicting! What's your May craft going to be?"  At first, I was just plain excited for getting a compliment on my bread from someone who I consider a felt-food genius.  After I got over myself, I noticed her question, "What's your May craft going to be?" 

Aaack!  What IS my May craft going to be?  For some reason, I spent so much time marveling over how fast April went, that it didn't occur to me that I needed to figure out what my eighth craft till Christmas is going to be.  So . . . I have one day to narrow down all the projects on my "someday list" to one for May.  

In the meantime, I'm still showing off my felt foods . . . which brings me to my Monkey's favorite food.  For her, a set of play felt food would not be complete without a children's classic - PB & J.  Yes, that's right . . . if I ask her what she wants to eat - whether it be breakfast, snack time, lunch or dinner - her instant reply is, "peeent bahtar and jally".  (Her sister, on the other hand, groans every time a PB & J sandwich finds itself on a plate in front of her.)


This was so easy.  The result wasn't pretty, (I'm much happier with the peanut butter) but I think it will work for a two year old . . . her standards for felt peanut butter and jelly are probably pretty low.  

1)  I cut 1 bread shaped piece out in purple (for grape jelly).  I used a brownish orange color for peanut butter.  

2)  Next I cut out a few blob-like shapes and arranged them on the purple bread shape to make a "spreadable" effect.

3)  Then I used my sewing machine to attach these blob-like shapes to the bread shape.  I didn't really have a rhyme or reason for the sewing.  I just did swirls and flowy shapes until the blob pieces were securely attached to the bread shaped piece.  I used a contrasting thread, but I may try it again with matching thread to see if I like that effect better.  

4)  Repeat with brownish orange for peanut butter. 

Craft on!

Wednesday, April 28, 2010

my foray into felt foods

My foray into felt foods has been frustrated by a fantastically frantic April.  (Ahhh . . . alliteration . . . the overkill of one poor unsuspecting letter.) 

But seriously, I feel like this month has gone super fast.  Wasn't it just March?  Now it's almost May!  And my hopes and dreams of a humongous pile of felt food for my ninth craft till Christmas hasn't been completely realized.  Sadly, my once-hoped-for humongous mountain has become a more realistic barely-there hill.  While I've concentrated on felt foods this month, I will probably keep dabbling in them here and there in the coming months till Christmas.  I want to be able to give my girls an assortment of goodies. 

If you've been reading along, you have seen my "frozen" felt treats and you have heard the inside scoop on my struggle with making bread . . . the felt kind.  Tonight, I want to unveil the result of this struggle . . . ta da . . . delicious, nutritious 100% whole wheat bread.  

Now, there are a plethora (gosh, I love using that word) of tutorials out there on making bread of the felt kind.  As I mentioned when I started this month's foray into felt foods, I wanted to find my own way and only rely on these fabulous tutorials if absolutely necessary.  That's how I do things . . . I rarely go by a recipe, I hardly ever read the directions when putting together a new toy, and my sewing/crafting journey has been decidedly similar.  

So, here's my recipe for felt bread:

1)  Take out a piece of bread (yes, a real piece of bread) and trace it onto your felt or a piece of paper for a pattern.  Then tweak it a little bit as you cut it out if you want to exaggerate the bread shape.  I wanted a little bit of an indent on the top of the loaf, so I added that in the cutting process.  Obviously, you need two of these shapes for every piece of bread.  (Thank you Captain Obvious!)

2)  Measure around the outside edges of the felt bread shape and cut a 1/2 inch strip from the felt you've chosen for the crust. 

3)  Now, begin to hand sew one bread-shaped piece to one edge of the crust strip using embroidery thread to match the crust.  (I used a blanket stitch because it seems to really seal up the edges.)  Sew the crust strip all the way around the bread piece.  Make sure you leave a tale of the felt strip at the beginning and the end because you will need to sew the two together. When the end of the long strip meets up with the beginning, fold ends up into body of the bread and sew these two ends together.

4)  Cut four or five layers of quilt batting in the same shape as the bread pieces.  (The number of batting layers you use depends on how puffy you want the bread.  Batting is super easy to cut in multiple layers, so just layer up your batting and cutaway.)  Place into crust and bread piece.
5)  Take second bread piece and place it on top of batting.  Sew this piece to the crust sandwiching the batting in between.   

I started out thinking I was going to make enough bread to fill a bread bag.  I figured out that was a lofty goal after it took me three hours just to do the first piece of bread.  Thankfully, I got into a bread-making rhythm, and it ended up taking less and less time with each piece.  However, I also have a short attention span, so after six pieces of bread, I transitioned my bag of bread to a loaf pan of bread with about a third of the loaf yet to be cut.

Making a "loaf" of bread is pretty similar to making a piece.

1)  Cut two bread-shaped pieces. 

2)  Cut a crust strip about three or four inches in width to fit around the perimeter of the bread pieces. 

3)  Sew bread piece to crust strip using same directions above. 

4)  Cut eight bread shapes out of quilt batting.  Insert first four pushing them all the way into the bread.  Fill the rest of the inside up with felt scraps or other soft scraps.  Lay the final four bread-shaped batting pieces on the top of filling.

5)  Sew second bread piece over top of filling to crust strip. 

Enjoy your delicious loaf of bread.  You could make the ends of the bread by using the same felt you used for the crust as one bread piece.  However, my girls protest wildly when I make them eat the ends of the bread, so I decided to spare them the ends for playtime.

Here's my loaf baking . . .


Let it cool on the counter, slice, enjoy and . . .
craft on!

Thursday, April 22, 2010

calling all felt foodies: felt "frozen" treats

I've decided that I love felt . . . not like I love my kids, but felt comes in fun colors, it's easy to work with, and it's possibilities seem endless when it comes to making fake food.  The other great thing about felt is that is doesn't whine, complain or pout when you say "no".  (It was one of those nights at our house.)  

 
I feel like I don't have much to show for three weeks of felt food crafting, but I blame that on the bread.  Oh bread . . . how you almost beat me!  But I persevered.  And while it took me a while to get the hang of those silly slices of bread, tonight I managed to make these sweet treats . . . two frozen fruit popsicles, complete with actual popsicle sticks.  Hopefully, my girls think they are just as delicious looking when they open them next Christmas in the dead of winter.  Hmmm . . . maybe I should have made felt hot chocolate instead!

 
If you are a felt foodie, these are so easy to make that you can definitely figure it out for yourself, but here's my process:

 
1) Grab the following stuff
  • 2 felt pieces in preferred popsicle size - We usually eat Edy's Fruit Bars with giant-sized chunks of fruit in every bar . . . delicious!  So, I took one out of the freezer and traced it for the perfect shape. 
  • long strip of felt about 1/2 inch wide in same color long enough to fit around perimeter of the popsicle pieces plus an extra inch
  • embroidery thread in similar or contrasting color
  • quilt batting - 4 layers cut in similar shape and size of felt popsicle pieces 
  • craft clue
  • popsicle stick
 
2) Using embroidery thread, sew the long strip all the way around one of the popsicle pieces.  Make sure you leave a tale of the felt strip at the beginning and the end because you will need to sew the two together.  I used the blanket stitch . . . frankly, because I used this stitch on the bread and I think it's all my hand knows how to do at this point.  When the end of the long strip meets up with the beginning, fold ends up into body of popsicle and sew these two ends together.


3) Snip a very tiny slit in the bottom of the long strip about right where a popsicle stick would be on a real popsicle. 

 
4) Put craft glue on both sides of the top third of popsicle stick.  Sandwich the stick between batting with two layers of batting on top of stick and two on bottom.

 
5) Gently wiggle popsicle stick through tiny slit.  The slit should be small enough that the stick doesn't slid in too easily.  The bottom two-thirds of stick will jut out of the bottom, and the batting should fit into the felt popsicle piece.  

 
6) Sew second popsicle shape to the 1/2 inch strip using the blanket stitch.  Adding this final piece will cover up the batting.


Just try to resist licking this tasty-looking frozen treat and . . .

 
craft on!

Monday, April 12, 2010

two things I learned today

Each night as I tuck my oldest into bed, I ask her, "What is one thing you learned today?"  Well, tonight I'm answering my own question.  Here are two things I learned today:

First, I learned that I need more than two hours to create a Little House on the Prairie cabin birthday cake.  Who knew?  I made my youngest daughter's dog house cake in two hours, so I gave myself two hours for Laura's cabin.  Denied!  I tried and tried and tried, but I just couldn't make it work.  I called my daughter into the  kitchen and said, "Honey, mommy may not be able to make you a Little House on the Prairie cabin cake in time for your party."  She said, "Mommy, it's wonderful.  I love it!"  This is what she was looking at . . .

This is clearly a cake only a daughter could love!  I love her even more (although I'm not sure it's possible to love her more than I already do) for saying that.  I tried a few different methods, but I finally had to admit failure.  Here's a few other pictures of the cake that almost was. 

As I was tucking her into bed tonight, she said, "Mommy, can you tell me a story about a time when your mom tried to make you a hard cake and failed."  Aw shucks . . . sometimes I hate failure!  But in spite of not being a fan of failure tonight, I will be adding this cake to my flickr group celebrating failure. 

The second thing that I learned today is that I can make felt bread.  Yippeeeee!  Success!  One piece down . . . nine more to go. 

Celebrating failure and success tonight.

Craft on!
SYS Thurs

Thursday, April 8, 2010

tonight i'm making bread . . . it's a slow process

I thought that making bread from felt would be easier than baking bread from flour.  I was wrong . . . very, very, very wrong.  Originally, my over-achieving self was going to repurpose a Sara Lee bread bag by filling it with a dozen or so slices of felt bread.  I can say that after one night of making felt bread that my girls will be lucky to get four pieces of bread total - enough for each to make a sandwich.  I worked for over an hour, and this is as far as I got.
Yes, that's one side of one piece of bread stitched to the crust about a fourth of the way around.  That's what I have to show for 70 minutes of my life . . . yikes!

Here are a few more pictures of my 70 minutes of bread making:

This is me actually tracing a piece of bread to get the shape of my felt pieces.  I can honestly say that I've never had a reason to trace food before, so this was kind of fun.  (And yes, I did put the bread back in the bag afterwards.  Shhh . . . don't tell my husband.)  I had just enough oatmeal colored felt to make two pieces.  Looks like I will be making another trip to the craft store at some point.

If you've been reading along since January, you know my struggle with using a rotary cutter.  If you haven't, let me catch you up to speed . . . I have serious trouble using a rotary cutter.  There, you're caught up.  But I managed to use one tonight to make my crust.  I measured out a half-inch and used a few of the tricks that many of you passed on to me in January during my angst-filled introduction to the rotary cutter and cutting mat, and the crust piece turned out almost straight.  Little victories!

So my journey with making food has begun.

Craft on!

Wednesday, April 7, 2010

i'm getting hungry . . .

Thinking about all the different felt foods I'm going to be making this month for my ninth craft till Christmas is making me hungry.  I'm expecting to gain at least five pounds this month.  Maybe I should have went with a felt board instead of felt food.  Too late now . . . I'm already hooked.  I know that there are A LOT of great tutorials out there for felt foods.  I've been super inspired by One Pretty Thing's Felt Food Round-up, but I'm going to experiment a bit with my own ideas before I revert to using these fabulous tutorials.  If you are looking for one great site for felt food, I recommend checking out Polly's Helping Little Hands and her felt food cook-along.  Polly also gives step-by-step instructions for making this delicious looking pizza pictured below.  Are you getting hungry yet? 
Eat up and . . .
craft on!

Thursday, April 1, 2010

HELP!

Well, it's April 1.  You know what that means.  Okay, maybe you don't know what that means, so I'll tell you . . . the beginning of a new month means the beginning of a new craft.  I'm waffling between felts foods, a felt playhouse, felt slippers or a felt board.  Are you sensing a theme?   

I have a stockpile of felt that I would like to start giving new life so it doesn't just sit around, but I just can't decide between these four fun ideas.  I'm crazy busy for the next few days, so I won't be starting anything new until after Sunday.  That leaves me four days to decide.  Help me . . . pleeeeaaase!  Leave a comment below and vote for which one you think I should do.  If no one comments, I'll be left to my own devices . . . yikes!  

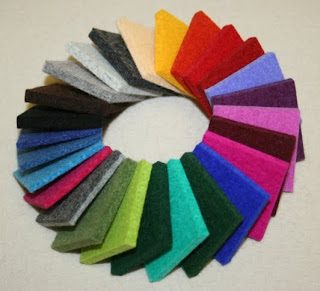
In the mean time, go pick up your own felt rainbow from your local craft store and . . .
craft on!
   
Related Posts with Thumbnails