Showing posts with label sixth craft till Christmas. Show all posts

Thursday, July 29, 2010

haircessory/jewelry holder how to

Are pigs flying? 

I ask because two amazing things happened this week:

1) For the first time since January, I'm on track to finish my sixth craft till Christmas at the end of the month.  Crazy!  And to think, this was the month that I said I probably wasn't going to even work on a craft-till-Christmas project.

2)  I used a power tool for the FIRST time ever in a craft project.  I feel powerful and super cool now!  I know . . . I know . . . I'm not cool, but I like to think using a power tool makes me a little bit cooler than I was.  ;)

A few weeks ago I announced that I would be doing haircessories and a haircessory holder for this months craft till Christmas.  I've shown you a few tutorials on some of the haircessories.  And I plan on doing a few haircessories throughout the next few months as well to add to the bunch I've done this month.  But I'm capping off this month's craft/gift item with this haircessory holder.  

Here's what you need:
-a board (I used small cutting boards I found on clearance for 95 cents.)
-sandpaper
-acrylic paint
-knobs and pulls with screws
-power drill
-ribbon
-embellishments of your choice

Here's what you do:
1)  Sand any rough spots on the board.

2)  Mark where you want the knobs and pulls.  Then use power drill to make holes.

3)  Paint.  Let dry.  Paint another coat.  Let dry.

4)  Put pulls and knobs on and embellish.

5)  Super glue ribbon on to the back of the board.  Cover back of board with felt to protect wall from getting marked up by screws.

6)  Hang.

Done! 

As you know, these will be tucked away until Christmas.  My Christmas cupboard is getting full, and I'm beginning to start thinking I may need to find another hiding place for these gifts. 

**Update**
A few people have commented or e-mailed that they don't have girls to make this for.  My recommendation is . . . make it for yourself and use it for jewelry.  Poke earrings/nose rings through the ribbons, hang cuff bracelets on the pull and put other bracelets and necklaces on the knobs.  I have this on my list to make for myself as a jewelry holder if I ever find the time. 

In the mean time, I'm thinking about my August craft . . . my fifth craft till Christmas!  Wow!  I've actually stuck with something longer than a few months.  I just might actually complete my entire goal of a year of Christmas gifts!  Honestly, I'm shocked, excited and ready to . . .

craft on!
I was kind of excited when Fawnda and Jeannine announced that the secret ingredient for this round of Iron Crafter was knobs and hinges because I already had this in the works.  It fit perfectly.  However, there is another amazing crafter/blogger who had similar inspiration for the contest.  And I'll be honest, I think her project rocks.  I love the lettering she did on it, and it's not as busy as mine.  Go check Mandy's entry in the contest out at Sugar Bee.

Friday, July 23, 2010

no-sew headband tutorial

My haircessory marathon continues.  I'm super excited about this one because it requires absolutely no sewing.  Many of you have mentioned that you aren't on friendly terms with a sewing machine, so this little headband is for you!

(This one was an experiement, so I have to admit that I made it just for me and not my kids.  ;)  But now that I know it works, I'll be making some kid-sized headbands to add to the sixth craft till Christmas stash.)

What you need:
-2 ribbons (Measure from that bone right behind one ear across the top of your head to the bone behind the other ear.  Cut two ribbons this length.  How's that for a technical measurement?!)
-double-sided fusible fabric tape cut the same length of your ribbons (Make sure your ribbons are about the same width as your fabric tape.)
-2 - 1/2 inch pieces of double-sided fusible fabric tape a simple elastic headband
-an iron

What you need if you want to make it fancy:
-long thin fabric scraps
-a hot glue gun


What you do:
1)  Sandwich fabric tape inbetween the two ribbons.  The ribbon should be facing right sides out.

2)  Iron according to fabric tape directions.  Let cool.

3)  Take elastic headband and place it on one end of the ribbon.  Fold the ribbon up about 1/2 inch.  Take 1 of the 1/2 piece of fabric tape and sandwich it into the fold.  Iron according to package directions.  The elastic should now be stuck in the ribbon fold.

4)  Repeat with other side of ribbon and elastic.  Let cool.


You can leave it just like this or go on to the next step to fancy it up a bit!


5)  Take thin long fabric scrap and twist it into a long twisted fabric scrap. 

6)  Start winding long twisted fabric scrap around itself using hot glue to secure the winding in place.

7)  After winding up the majority of the fabric secure the tail underneath the flower with hot glue.

8) Add an outer layer using a different color with the same process.  See center flower.

9)  Secure finished flower onto ribbon with hot glue.  Add just one flower or do two or three.   

And that's an easy, no-sew headband. 

Of course, my daughter woke up from her nap while I was typing this up AND still wearing the headband on my head . . . so guess what that means . . .

Hmmm . . . hopefully, she will completely forget about these by Christmas.  On the bright side of things, at least now I know she likes them!

This took me less than 30 minutes with stuff I already had on hand, so 27 minutes and $0.00 later I have a cute headband and a great gift idea to add to my sixth craft till Christmas.  

Craft on!


Trendy Crafter Button

I participate in these parties.  Check them out!


Wednesday, July 21, 2010

felt haircessories how to

Felt anyone? 

I have a superabundance of felt.  I'm not sure how I acquired so much, but I think I may have to make every single craft till Christmas that I have left out of felt just to put a dent in my supply.  I was sitting in the middle of my felt pile the other night pondering felt and my sixth craft till Christmas - haircessories (another one of my made up words combining hair and accessories).  And it became quite obvious that I'm going to have to make a number of my haircessories out of felt.  And since I'm still working through my funk, I'm really glad that I chose haircessories for my sixth craft till Christmas because they are easy . . . at least the ones I make are easy since I'm all about easy crafts.


These no-sew felt-strip bows are so easy that they only require five things:
-scissors
-fabric glue
-barrettes and/or headbands
-embroidery thread

Hmmm . . . what else am I forgetting?

Oh, yes . . . felt!


Here's what you do:
1)  Cut 15 to 20 thin felt strips in various colors.  I used three colors and I varied the length of the strips, but I kept the width about the same for each strip - about 1/4 inch in width.

2)  Pull together all the strips BUT ONE (put this one aside for the next step) and tie very tightly with embroidery thread in the center of the felt strip bunch.

3)  Put fabric glue on the remaining strip, hold the top-side of the barrette to the felt bunch and the remaining felt strip around the embroidery thread and the top of the barrette.

4)  Hold firmly for a few minutes.  Put down and let dry for a while.  Done!
**If you are using this felt-strip bow with a headband similar to the use I used, simply wrap the remaining felt strip around the embroidery thread.  Let dry.  Then stick the headband through the middle of the felt bow.  Guess what?  You can change headbands easily by sliding this one out and sliding another one in.  Yippie!

Craft on!

I participate in these parties.

Thursday, July 15, 2010

yo-yo headbands


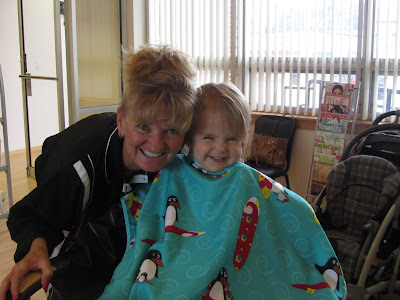
Look at this face! 


That's the face of a little girl who just had her very first haircut.  (That's her say-cheese-I'm-smiling-for-the-camera face.  I can't get that girl to smile with her eyes open unless I catch her unaware.)  Yep, that's right.  She's almost 2 1/2, and she just had her first haircut.  I was letting her go for the wild-look . . . until now. 

It was here . . . somewhere between the first snip and the last smile, that I was finally inspired to start the sixth craft till Christmas.  Monkey was so excited to pick out her very own hair accesories.  She picked out one pink ponytail holder, one purple ponytail holder and an orange headband.  Actually, I think she would have picked out a few more things if we wouldn't have cut her off after three.  

So . . . here in the middle of July, I'm finally announcing my sixth craft till Christmas . . . hair accessories!  I'll be doing a variety of hair accessories for the next few weeks and some sort of hair accessory organizer.  

I'm starting off with an easy yo-yo button headband.  (I made two that they could wear now and I'll be making a few more to stash away for Christmas.)

Yo-Yo Button Headband

What you'll need:
-fabric scraps and felt scraps
-buttons
-flat elastic** or flat elastic headbands
-embroidery thread

**You can either buy your own flat elastic headbands or sew a few up quickly by cutting the appropriate size of flat elastic.  Overlapping the ends to form a loop and sewing back and forth a few times across the joined ends.

What you'll do:
1)  Cut out two circles of varying colors.  One circle will be bigger than the other.  I used can lids (because I've been collecting those things like crazy since Iron Crafter).

2)  Hand sew a long stitch around the edge of the little circle with the embrodiery thread.  Then pull the thread tight to form the yo-yo and tie a small knot.  Do the same thing with the big circle, but don't cut the thread or take the needle off the thread.

3)  Stack the yo-yos by pushing the needle still attached to the big yo-yo into the center of the little yo-yo.  Then slide the button on to the needle and thread stacking it onto the two yo-yos.

4)  Push the needle and thread back down through another hole on the button, both yo-yos and then through an elastic headband.  Now sew all these layers together like you are sewing on a button.

5)  To finish off, push needle and thread up through elastic and the larger yo-yo.  Pull needle out from the center of the big yo-yo.  Wrap it around the center of the yo-yo and push needle and thread through fabric and tie a quick knot.  Cut thread close to center of yo-you so it can't be seen.

Done! 

Here's one done with felt.  Rather than two yo-yos I used one yo-yo as the base and cut felt shapes as the middle layer.  The technique is exactly the same though. 

Super easy and can be done without a sewing machine . . . what could be better?

Hair accessory month continues tomorrow with my guest post over at Fireflies and Jellybeans.  I will be sharing my ruffled ribbon headband over there.  I'm so nervous but I'm . . . 

craft on!  
Related Posts with Thumbnails