In 7th grade, I broke up with my first boyfriend via my best girlfriend. She told him during lunch that I didn't want to "go out" with him anymore. (I'm not quite sure why we called this "going out" when our relationship primarily consisted of notes passed in the hallway and awkward conversations on the phone. But that's for another post.) This was the first sign that I was, and continue to be, bad at closure. I think that's why I have a hard time closing up each month's craft and moving on to the next month's project. So, in keeping with being bad at closure, I'm finally wrapping up my June craft - the pillow buddy - as we round out the month of July. I'm doing this in two part otherwise this would be an extremely long post. Today's installment is the tutorial for the body. The next installment will show how to make the head and attach it.
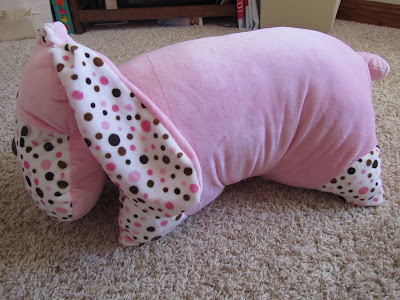
Here are the two pillow buddies that I almost finished for the seventh craft till Christmas. I still cannot settle on the right eyes for the kitty, so her total completion is in limbo for a while.
Here's how to make your own pillow buddy body.
Disclaimer:The following tutorial is for the basic construction of the pillow buddy. You will have to adjust depending on the animal that you choose to make. I wish I knew how to attach a PDF pattern, but alas, I'm technically slow so get ready to use your own creativity to create your cuddly pillow buddy.
What you need for the body:
1 - 20 x 20 inch piece of microfleece, regular fleece or chenille
1 - 20 x 20 inch piece of microfleece, regular fleece or chenille with corners cut out in an arch shape
4 - arch-shaped pieces of contrasting fabric (These arches should be slightly bigger than the arches that were cut from the body piece.)
2 - 4 x 10 inch pieces of microfleece, regular fleece or chenille for the strap
2 - 3 inch pieces of hook and loop (Velcro)
extra microfleece, regular fleece or chenille for the tail
Stuffing
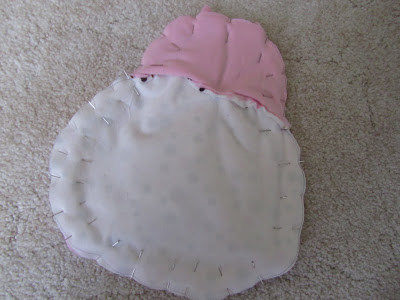
1) Pin all four arch-shaped pieces wrong sides together onto body piece in place of the arch pieces you cut off earlier.
2) Sew arches on.
3) Take the rougher pieces of Velcro and sew them parallel to the right side of one of the strap pieces.
4) Pin strap pieces right sides together. Sew around two long side and the short side closest to the Velcro. Leave the other short side open for turning. Turn strap piece right sides out. Top stitch with your machine around the two long sides and one short side.
5) If making an animal with a long tail, use one piece of fleece about 3 inches by 10 inches. Fold wrong sides together. Cut a rounded edge on one short end and pin. Sew around long edge and rounded end - leaving other short end open for turning. Turn right sides out and stuff. If making a short poofy tail, use two corners that you cut off from one of the 20 x 20 piece. Draw a big round partial circle like in the picture below on one wrong side. Pin right sides together and sew along partial circle. Cut of excess. Turn. Stuff.
6) Pin the tail to one edge of one of the 20 x 20 body pieces. Pin it to the opposite side of where you will eventually want the head.
7) Pin the strap piece edge to the edge of the same 20 x 20 piece. The strap piece should be pinned to the side left of the tail.
8) Pin the two 20 x 20 body pieces wrong sides together sandwiching the tail and strap piece inside.
9) Sew around this body piece leaving about three inches open for turning where the head will eventually be sewn on.
10) Turn body piece right sides out.
11) Stuff body piece pretty full.
12) Fold the pillow and pull the strap across the belly to find where the soft Velcro pieces should go. Hand stitch or use fabric glue to fix the softer side of the Velcro pieces on to the top 20 x 20 piece parallel to one another. Don't sew up the opening yet.
There you go . . . the body of your pillow buddy is done. Next time we will find out how to make the head and attach it. Stay tuned and . . .
craft on!


