Showing posts with label green crafts. Show all posts

Thursday, October 7, 2010

impractical fingerless gloves: i feel so edgy!

So I love a challenge . . . especially self-imposed challenges.  Uhm . . . you probably already figured that out since that is the entire premise of my blog.  You also may have figured out that I'm totally ignoring and neglecting my fourth and third crafts till Christmas.  (I'm not ignoring those crafts forever . . . just taking a short hiatus. I hope to get back on the Christmas gift/craft horse next week.)  Since I'm not working on what I'm supposed to be working on, I needed something to challenge myself.   So after making my deep cowl-neck scarf:

I decided to see how much of the remaining part of the sweater I can turn into something.  

This particular sweater project is inspired by:
image from here

Let's be honest . . . these fingerless gloves serve no practical purpose.  I could pretend that I made these because I want to keep my wrists warm, but that's not true.  Why on God's green earth would I need to keep my wrists warms but not my fingers?  


The truth is that I made these because I saw them in a store, and I liked the edgy vibe they gave off.  However, I knew it would be really hard to explain to my husband why I needed fingerless gloves, so I didn't want to pay money for them.  So . . . I made a bad replication. 

If you want to make your own pair of free, edgy, fingerless and therefore completely impractical gloves, then this tutorial is for you.  ;)

Here's what you need:
-the arms of a sweater

Here's what you do:
1)  Cut off about 8 to 9 inches from the sweater sleeves - depending on how long you want your impractical fingerless gloves to be.  Try on and determine if they need to be made smaller/tighter to work as fingerless gloves.  Mine needed to be about 1 inch tighter.

2)  Turn inside out.  Pin along seam and sew in 1 inch (or whatever you measurement from above happened to be) from edge.  BUT DON'T SEW A STRAIGHT LINE FROM BEGINNING TO END.  Do not sew about 3/4 of an inch where you want your thumb to go.  My thumb gap was about an inch from the top edge of the sleeve. (See last picture.) You may need to sew along the edges of the thumb gap if you are using a sweater that unravels easily.  Mine doesn't and I like the raw look, so I left it.
 

3)  Cut off excess sweater after sewing new seam.

4)  With the glove still inside out.  Fold and pin the cuff.  Sew creating a hem.  I actually put in two straight stitch hems.  I realized that I could have made the cuff tighter on this, but I actually like the slouchy look I ended up with. 

Done!  Now I'm ready to wear my completely impractical but free fingerless gloves.  Ooo . . . I look so edgy! ;) 


Craft on!


Friday, July 9, 2010

nothing to wear? super easy zigzag refashion

So, you've been thinking of getting into the world of refashioning the plethora of plain t-shirts in your closet, but you're too chicken to make that first cut. 

Your mind is swimming with questions:
  • What if I ruin the shirt? 
  • What if it looks stupid and people laugh at me? 
  • What if I need a plain lilac shirt in a few months, but I refashioned it and it's no longer plain?
  • What if my dog eats my homework?  Oh . . . wait, that excuse doesn't quite work for this list.
Let me ask you this: Are you wearing that shirt now?  Chances are you aren't. 

So you have two choices:
1) Don't wear it as it is now and let it sit in your closet OR
2) You try to make it something you would wear.

If you don't like, oh well . . . you weren't wearing it anyway.

This very simple and quick tutorial is PERFECT for getting your feet wet in the world of t-shirt refashioning.  And with the three vertical lines in the center of your torso, it's incredibly flattering too.  Perfect for wearing under an open sweater or blazer.  You can't get much better than that.  This shirt is inpired by the store Black and White . . . a story I love to wander through, but can't justify buying something from.  Now, I have my own Black and White refashion for nothing!  Woohoo!


The Super Easy Zigzag Refashion

Here's what you need:
-2 shirts (1 base shirt and 1 shirt you are willing to cut up)
-other sewing stuff - scissors, straight pins, sewing machine

No kidding . . . that's it!


Here's what you do:
1)  Cut 3 one inch strips of fabric from the bottom of the shirt.  Then cut open the strips so that each strip is one long piece rather than a loop.  

2)  Find the exact center of the base shirt, fold the end of the fabric strip underneath and start pinning one long strip of fabric in a zigzag motion down the center of the shirt.  You can start wherever you want from the neckline.  I used a scoop necked t-shirt as the base, so I started about 1 inch from the top of the shirt neckline.  Zigzag that strip all the way down to just below where your belly button would be.   

3)  Do the same thing on both sides of the center strip only start a little bit lower and end a little but lower. 

4)  Sew down the center of each zigzag from top to bottom.  (Don't forget to back stitch at the top and bottom of each zigzag strip.)

Done?  Yes, done!  Can you believe it?  You refashioned your first t-shirt!  Wear alone for an elongating look or pair with an open jacket/sweater/etc.

Congratulations!  Now you have the confidence to dig into that t-shirt pile and try your own unique creations and . . .

craft on!

Thursday, June 17, 2010

green craft: lacing beads

If you've been lurking around here at twelve crafts for a while (and chances are you haven't been), you might remember wood craft week.  In March, I hit a sewing-wall.  I just could not sew another stitch, so I spent a much needed week on wood crafts.  

During wood craft week I painted people.  Well, I didn't paint actual people; rather, I painted little wooden dolls.  I think they turned out kind of cute.  I would put these little dolls on my success list.  I couldn't keep them tucked away until Christmas, so I gave them to my girls in their Easter baskets.

On the other hand, my lacing beads project went right onto the failure list.  My niece received some lacing beads last Christmas.  My kids spent hours playing with their cousin's lacing beads.  Rather than pay $15.00 to $20.00 for a set of commercially made beads, I thought I would try my hand at it.  But . . . these little beads were tougher to master than I thought they would be, and I ended up putting them aside for a while.

I finally mastered the art of painting bobbins and other wood shapes, and I was able to finish this Christmas gift for my youngest daughter.   

If you are looking to dabble in making a homemade gift for a child in your life, this is the perfect gift to start with.  So grab the following supplies and get started.

Supplies for beads:
-acrylic paint or spray paint (Please don't use the cheapest acrylic paint you can find unless you are prepared to paint ten coats because cheap paint tends to be more watery.  Take it from me . . . this is not the route you want to go!)
-Modge Podge or other non-toxic sealer
-paint brushes

Supplies for recycled bead container:
-Clorox wipes container or other cleaning wipes container
-large fabric scraps
-ribbon
-Modge Podge (Again?  Yes, again!)
-razor/utility knife

STEPS FOR LACING BEADS:  (This is so easy that I feel silly telling you what to do, but I will anyway.)
1)  Sand any rough edges of bobbins, ball and wood shapes.  This may seem unnecessary, but I highly recommend it!

2)  Paint bobbin, balls and other wood shapes in various colors.  You will have to do three or four coats depending on paint thickness and color.  Let each shape dry in between coats.

3)  Seal each wood shape with Modge Podge.  I also used two coats of Modge Podge letting the first coat dry before I added the second.

4)  Lacing beads done!  How easy was that??!!

STEPS FOR RECYCLED BEAD CONTAINER:
1)  Strip label off Greenworks Clorox wipes or other wipe container.

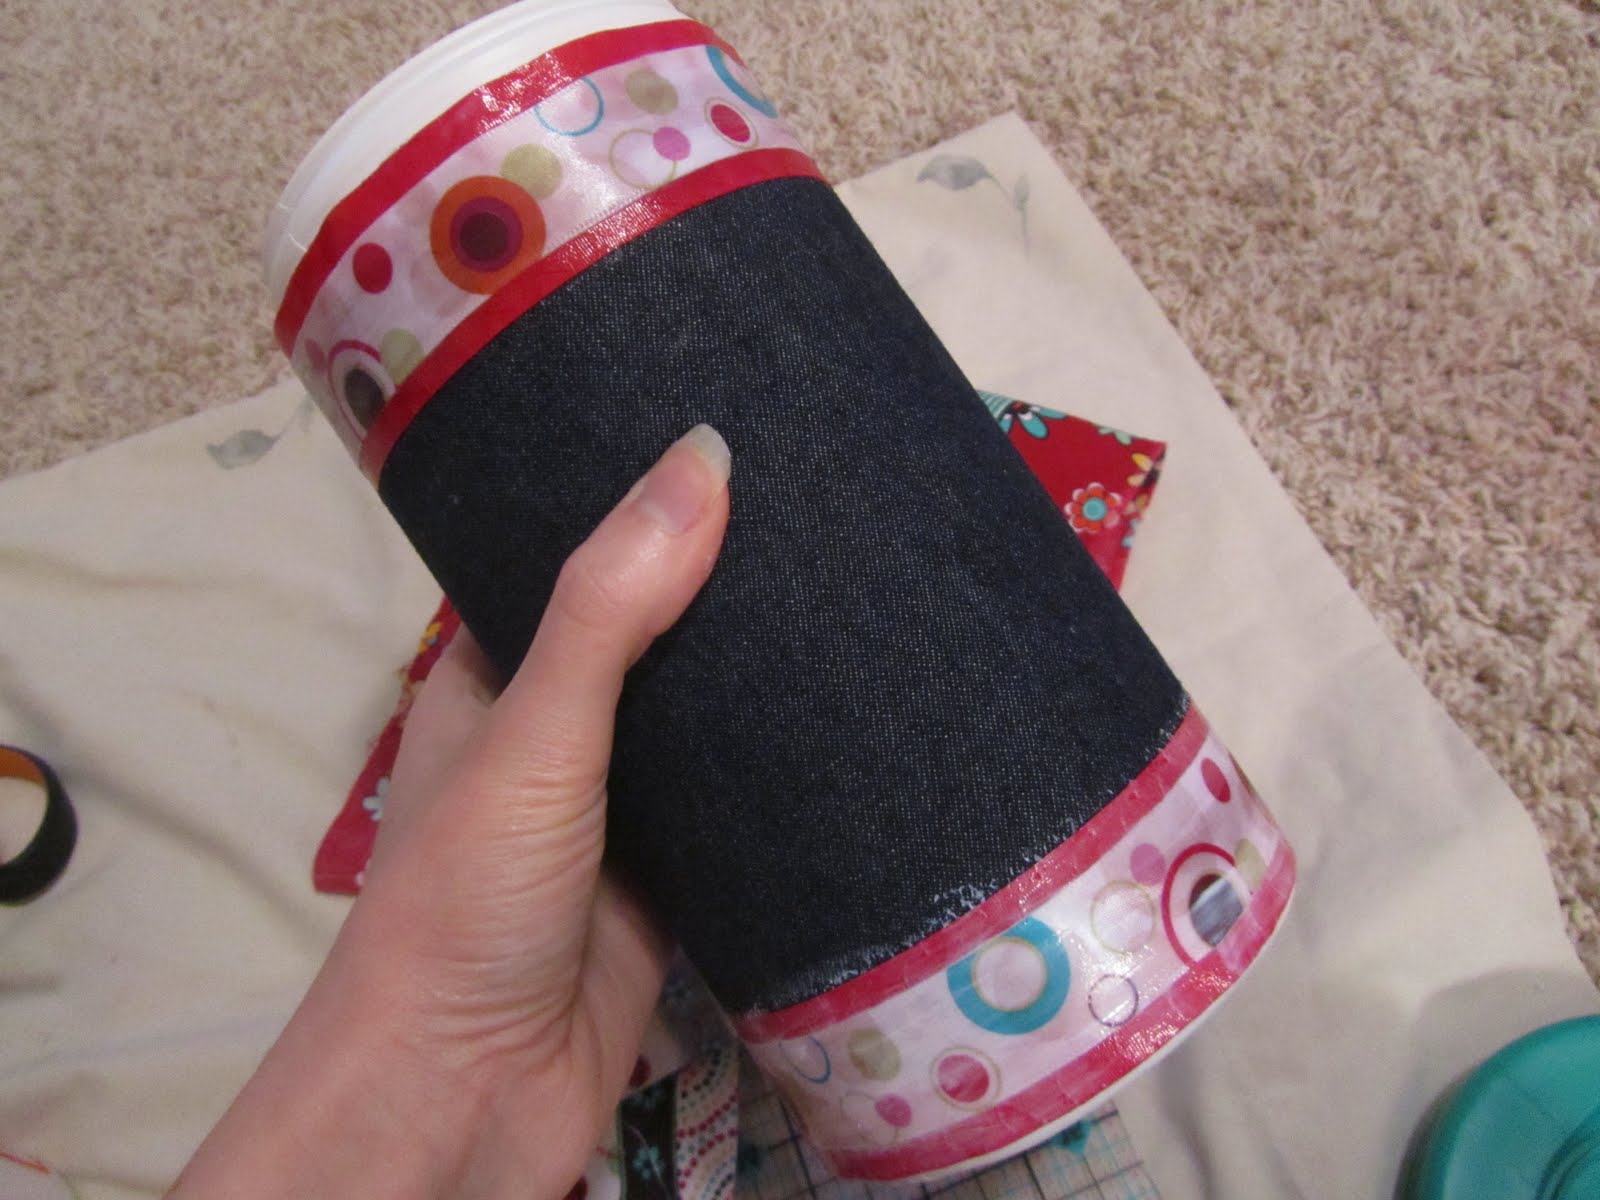
2)  Wrap large scrap around to cut accurate size.  Modge Podge this large scrap around the container.

3)  Modge Podge ribbons on top and bottom.  Don't worry it dries clear!

4)  Cut plastic center out of top opening. 

5)  Bead container done!  Can this get any easier??!!  (Here's some info I should probably leave out so that you don't think less of me than you already do, but I'm going to include it anyway.  I had the great idea to personlize this container with fabric letters saying, "Monkey's Beads," since they are for my youngest daugther, Monkey.  I printed out letter, traced them onto fabric, carefully cut out the fabric, and . . . lost all the letters.  So somewhere in my house are these little fabric letters that took me hours to create.  I'm hoping I find them before Christmas!)

Place beads and laces in container, wrap and give to a cute little child in your life.

Craft on!

Monday, June 7, 2010

matching soda can ring tutorial

Before we get to the tutorial on soda can rings, remember to head on over to Fireflies and Jellybeans to vote for the Iron Crafter Challenge.  They happened to pick my soda can jewelry for the top ten final vote.  If you like my soda can jewelry, head on over there and vote.  As a little blog in a sea of bigger blogs, every reader that votes counts.  Of course, it goes without saying that if you think another project fits the criteria better (originality, presentation, and use of the secret ingredient), you should totally vote for it.  I did just say it though, so I guess it doesn't exactly go without saying.  :)

Okay, I said I would post this tutorial a week ago, so let's get to it. These soda rings go great with soda can bangles and anklets.  Go back to that post to check out the tutorial and make your own.  (And feel free to stop by Fireflies and Jellybeans on your way out to vote for the Iron Crafter.) 

Go to your recycle bin and your scrap pile and grab:
-a soda can
-coordinating or contrasting scraps


You will also need:
-Modge Podge and paintbrush
-a hot glue gun
-scissors

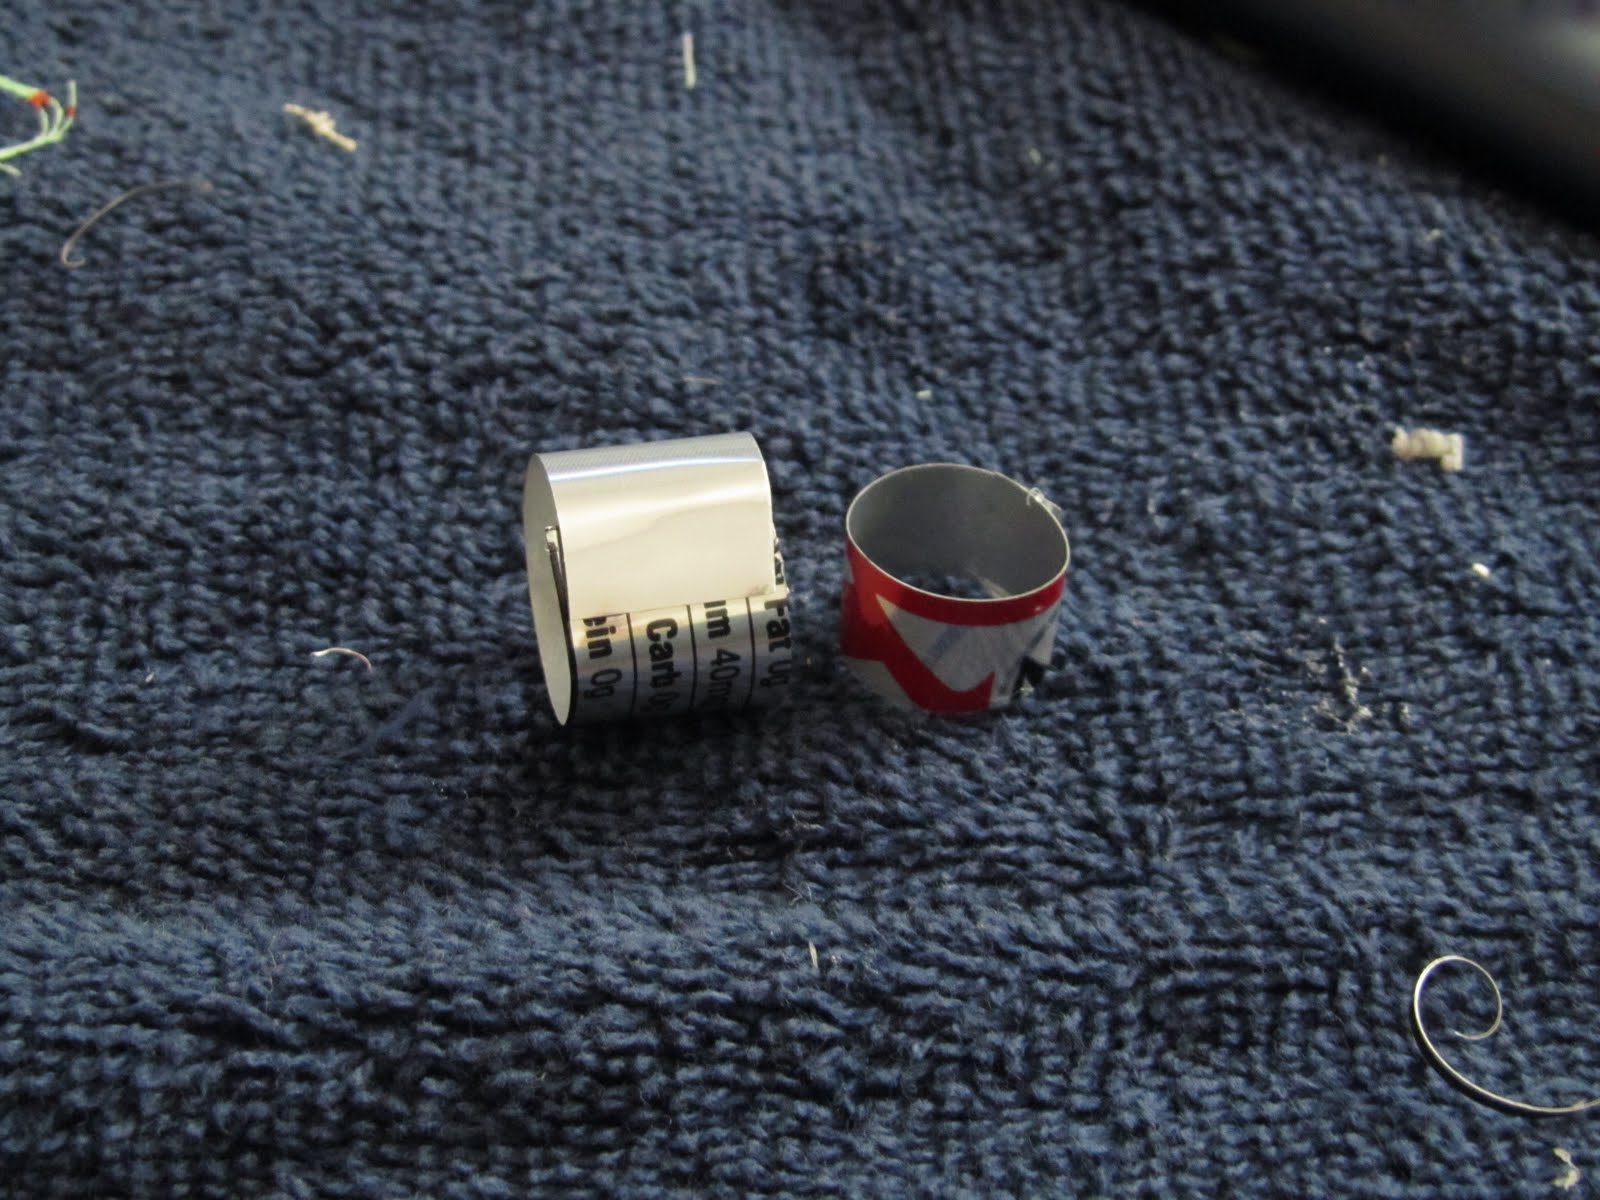
1) Cut a thin strip from your soda can. (This is way easier than you might think. Poke your scissors into the can and cut around the can.) Once you have the strip cut, cut off any jagged edges.

2) Wrap the can strip around your finger to size it. Make sure you cut the strip so about 1/4 of an inch overlaps.

3) Use your hot glue to form the ring by gluing the overlap. Hold tightly at this spot until glue cools a bit.

4) Cut strips of fabric scraps long enough to wrap around the soda can and overlap on the inside. You will want to use fairly thin strip of fabric - not varied widths like with the bangles and anklets.

5) Use Modge Podge and paint brush to affix fabric to can. With each strip added, paint the Modge Podge on before you wrap the fabric strip on AND paint the Modge Podge over the fabric strip. Keep adding strips this way all the way around covering up the overlapping section. Try to line up the inside overlap seam. Don't worry about the white, gluey Modge Podge look. It will dry clear.

6) Add one more coat of Modge Podge. Let dry.

7) (Optional) Use hot glue gun to add a button on the top of the ring. I didn't show this in the picture, but it's something I did on other rings.  (I didn't take a picture yet and blogger has been given me a little trouble so I just want to get this done while I still can tonight.)  I made the ring band narrower and added a button on top. I think this is super cute!

Here's a set - bracelet, anklet and ring.

Enjoy your new jewelry and . . .

craft on!
Related Posts with Thumbnails