 Before we get to the tutorial on soda can rings, remember to head on over to Fireflies and Jellybeans to vote for the Iron Crafter Challenge. They happened to pick my soda can jewelry for the top ten final vote. If you like my soda can jewelry, head on over there and vote. As a little blog in a sea of bigger blogs, every reader that votes counts. Of course, it goes without saying that if you think another project fits the criteria better (originality, presentation, and use of the secret ingredient), you should totally vote for it. I did just say it though, so I guess it doesn't exactly go without saying. :)
Okay, I said I would post this tutorial a week ago, so let's get to it. These soda rings go great with soda can bangles and anklets. Go back to that post to check out the tutorial and make your own. (And feel free to stop by Fireflies and Jellybeans on your way out to vote for the Iron Crafter.)
Go to your recycle bin and your scrap pile and grab:
-a soda can
-coordinating or contrasting scraps
You will also need:
-Modge Podge and paintbrush
-a hot glue gun
-scissors
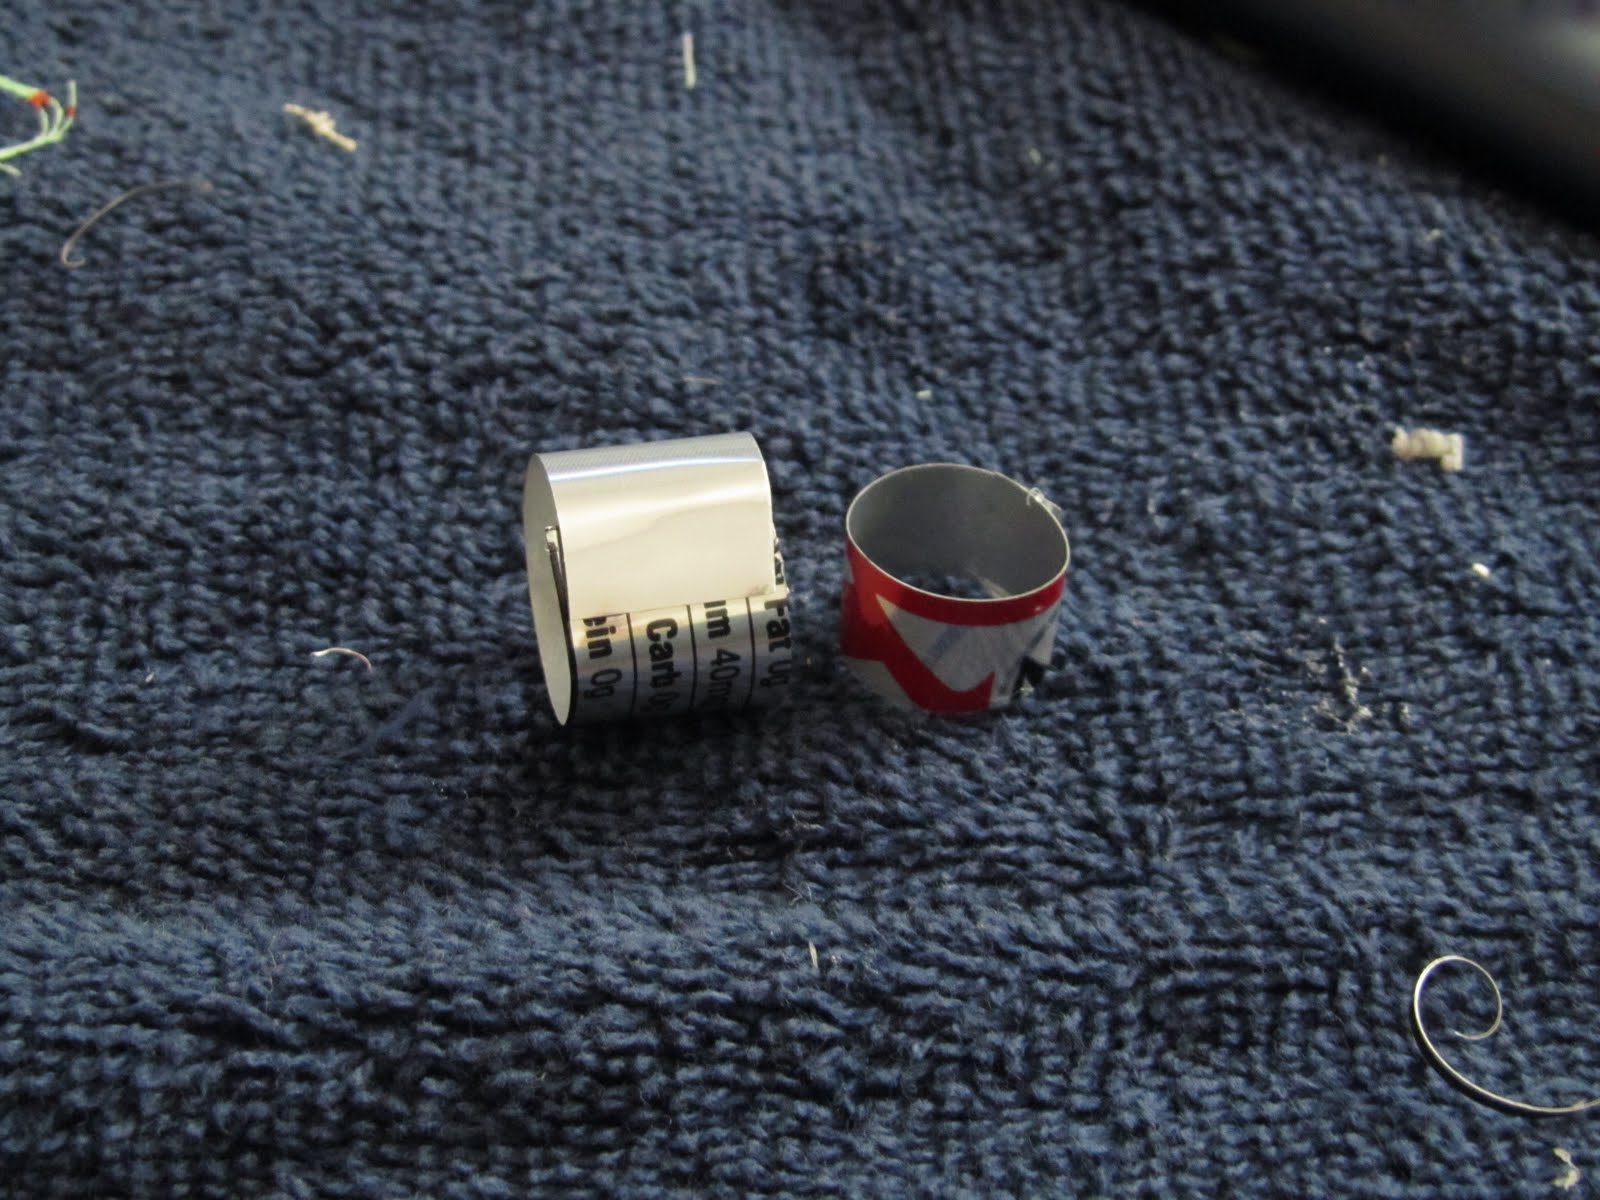
1) Cut a thin strip from your soda can. (This is way easier than you might think. Poke your scissors into the can and cut around the can.) Once you have the strip cut, cut off any jagged edges.


4) Cut strips of fabric scraps long enough to wrap around the soda can and overlap on the inside. You will want to use fairly thin strip of fabric - not varied widths like with the bangles and anklets.


6) Add one more coat of Modge Podge. Let dry.

7) (Optional) Use hot glue gun to add a button on the top of the ring. I didn't show this in the picture, but it's something I did on other rings. (I didn't take a picture yet and blogger has been given me a little trouble so I just want to get this done while I still can tonight.) I made the ring band narrower and added a button on top. I think this is super cute!
Here's a set - bracelet, anklet and ring.

Enjoy your new jewelry and . . .
craft on!


26 comments:
following from TT... Have a great day.
Love that you are using stuff you recycle!
Found you through the Tuesday Tagalong. Come check out my new blog design. Lots of ecofriendly giveaways, freebies, and coupons! Have a great week!
Diane
www.turning-the-clock-back.blogspot.com
Elizabeth! How creative are you. I love your ring and bracelette set. I'm here from the Tuesday blog hop and your newest follower. Hope you come visit my blog and follow me too? Thanks. This is really a crafty blog and I can learn a lot hanging around here. Smile.
Haupi
http://hauplight.blogspot.com/
Visiting from Tuesday Tag-Along! I hopped over from The Two Savvy Sisters Blog and am so happy that I did. Please accept my invitation to drop in at my place one day this week when you get a moment. I have become a follower and I hope you’ll do the same.
Nicole @ TheTwoSavvySisters.blogspot.com
HI, following you from TTA, I admire the craftiness but I'm not sure I want to be reminded about Christmas in June!!! Still I'll keep checking in and seeing how you're doing..
I love those! A good excuse to drink some pop too :).
Very cute! I love this idea. :) So creative of you. (And I popped right over and voted for you! woohoo - hope you win!)
very cool. that is a fun idea!
Very cute and crafty! Thanks for linking up at PonyTails&FishScales!
tere
i love the ring! i def want to make on of those!
I love these!
I featured them today at:
http://firefliesandjellybeans.blogspot.com/2010/06/spotlight-sunday-soys-31-favorites.html
These are adorable!! I'm seeing your work all over the place these day! Yay!!
Thanks for linking up to Saturday is Crafty Day!
Laura @ along for the ride
Very cute idea...
Loved visiting your fun blog
xoxo~Kathy @
Sweet Up-North Mornings...
So cute!! I hope you'll join us Saturday for our Linky Party!
http://nv-craftenvy.blogspot.com
Love your jewelry!
I featured you on PonyTails&FishScales!!! Thanks so much for sharing this awesome tutorial and craft! My kiddoes will be doing this this week for sure!!!
terelauritsen.blogspot.com
tere :o)
I love crafts made with things from around the house. You are so clever! I'm visiting you with TGC, hope you visit me too!
Super cute! Good luck in the contest!
Thanks for linking up to the Mad Skills party!
This is such a clever idea! I just love the wrapped fabric! Super cute! Thanks so much for joining the Sunday Showcase! I greatly appreciate it! Hope you have a wonderful week! ~ Stephanie Lynn
cute! thanks again for sharing :)
Very cute--my daughter would love making these! Thanks for linking up.
Love the rings! Great upcycling idea!
OH I just saw you on Keeping it Simple...how COOL! Mod Podge rocks for sure and this jewelry is tooo awesome! GREAT GREEN CRAFT!
really super cute!!! way to fashionably recycle!
sisters4saymoreismore.blogspot.com
great tutorial.
thank you.
our readers would love this project also, so get a free link back to your site here, and let them know about it, please:
http://www.finecraftguild.com/diy-tutorial-linky-party/
That is too cute!
Great Post!!
Thanks for sharing this wonderful post with us. This is more helpful for find out the best and unique quality of Everyday anklets jewelry online for women's or girls.
Post a Comment