I've been either working on a pillow buddy or working on a pillow buddy tutorial for what feels like forever. Uhm . . . that is apparently my overly-dramatic side kicking in because I went back in my archive and it turns out I've only been working on the pillow buddies since June 20. Hmmm . . . by my calculations that's only a little over a month . . . not forever.
Below you will find part 2 (the final part) of the pillow buddy tutorial. For part 1 which guides you through the body-making process, go here. Or for a pdf version click here.
**Disclaimer**
The following tutorial is for the basic construction of the pillow buddy. You will have to adjust depending on the animal that you choose to make. I wish I knew how to attach a PDF pattern, but alas, I'm technically slow so get ready to use your own creativity to create the head of your cuddly pillow buddy. AND I know I probably don't need to say it but I'm going to anyway . . . this is for personal use only not for resale use.
What you need for the head:
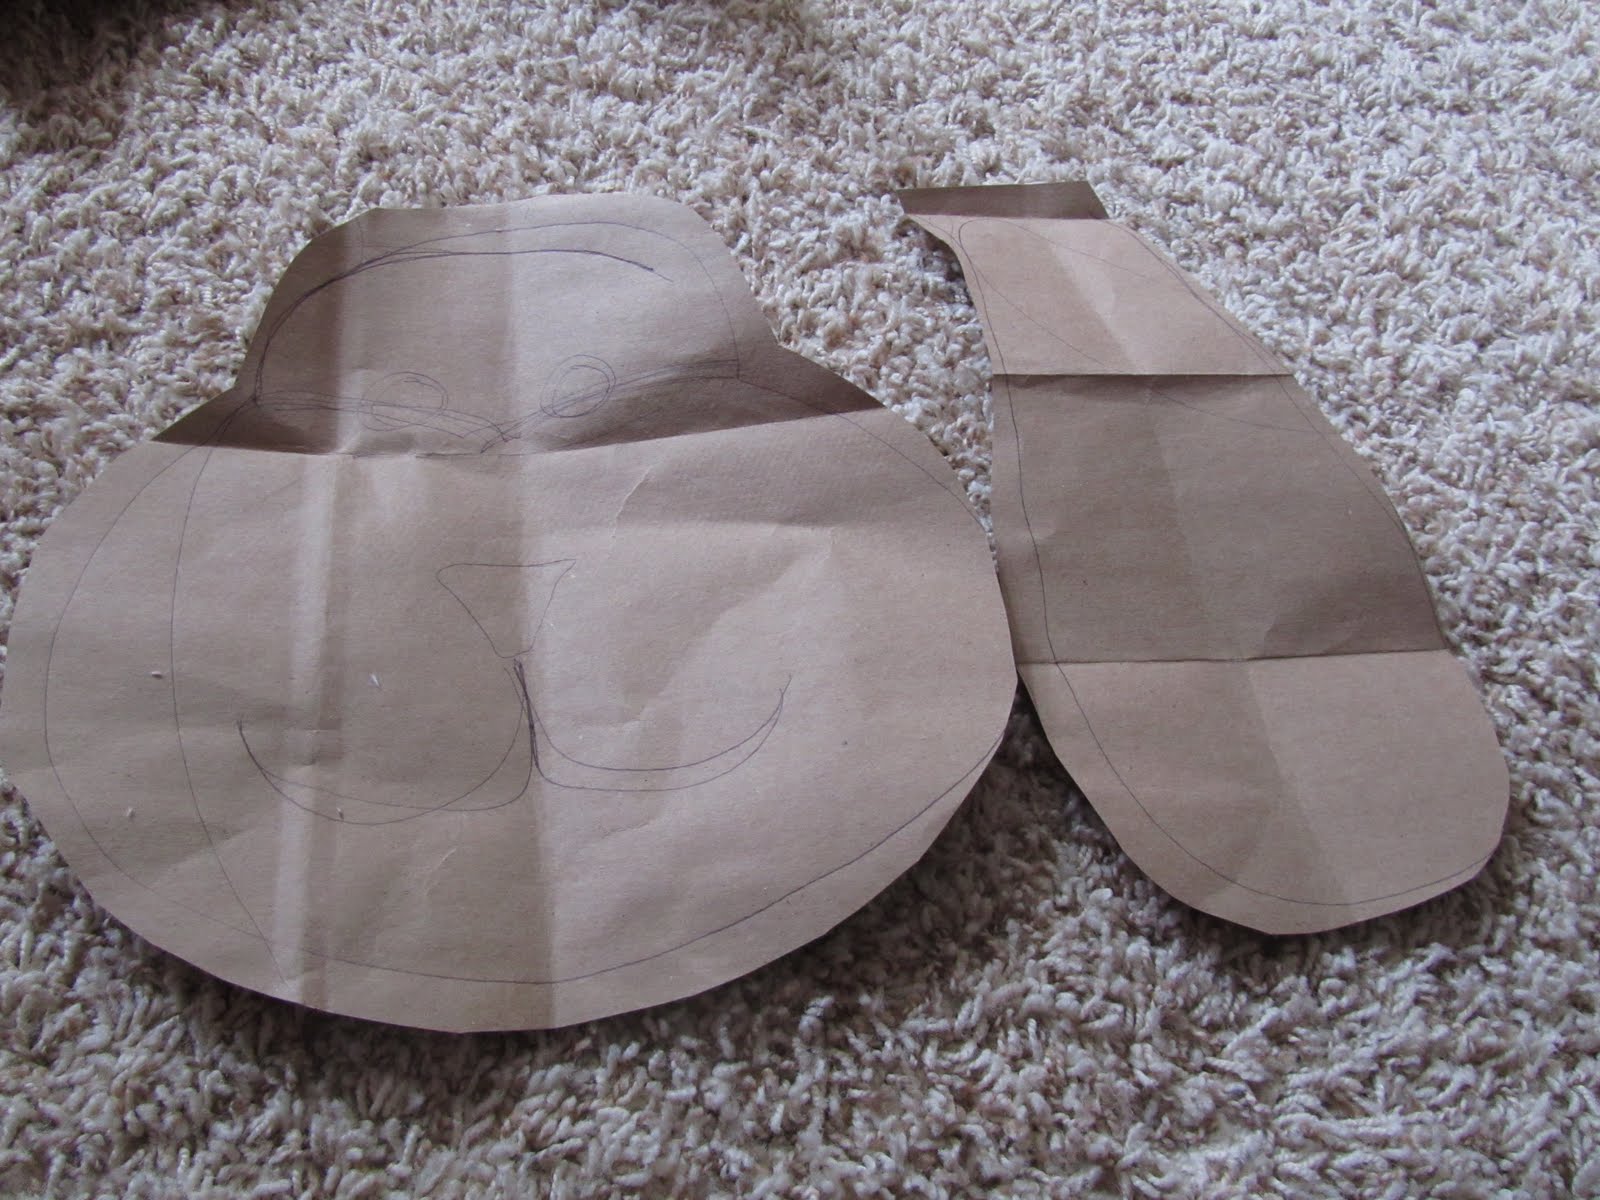
-a brown paper bag cut flat for pattern
-microfleece, regular fleece or chenille
-small felt scraps
-embroidery thread
-stuffing
What you do:
1) Draw freehand the shape of your animal's face onto the brown paper bag. If you aren't too fond of freehand drawing, google "coloring pages of dog head" (or whatever animal) and you might find a page you can enlarge and print off for your pattern. Cut out pattern head. Draw and cut out ears separately. Because the pillow buddy body turns out to be a little over 18 inches, I kept the widest part of the head (the cheeks) to about 10 inches. KEEP IN MIND THAT YOU NEED ABOUT 1/4 to 1/3 INCH EXTRA ALL THE WAY AROUND FOR SEWING AND TURNING.

2) For both the puppy and the kitty I decided to use some contrasting fabric for a part of the face. You don't have to do this. If you want to, first take the head pattern and pin it to your fabric. Cut out ONE piece from this pattern for the back of the head. Unpin. Now cut the pattern piece in the way you want the front of the head to look with contrasting fabric. Pin these pieces to your fabric of choice and cut out adding even more of an edge wherever you will be sewing the two pieces together.


3) Put the two contrasting pieces of fabric for the front of the head right side together at the edges and pin. Sew together. In the way I did this for the puppy, I made little eyelids which you can see in the second picture below.


4) You need four pieces cut from the ear pattern. Put ears right sides together and pin. Sew around leaving flat ends open for turning. Turn. You can top stitch around the ears once they are turned, but I chose not to for the pupply so that the ears would be pretty floppy looking. I cut four large triangles for the kitty ears and I DID topstitch the kitty ears after turning to make them stiffer and more likely to stand up.


5) Baste or pin the ears to the right side of the back of the head.

6) Layer the front piece of the head over the ears sandwiching the ears in between. Head pieces are right sides together. Pin. Sew around leaving about two inches open for turning.

7) Turn head right side out.

8) Stuff head but don't stuff it too full yet because you are going to sew on the nose.


9) Cut out a piece of felt for the nose and start to sew it on with embroidery thread. I waited to do this until now, so I could see exactly where the nose would be when the head has stuffing in it. After sewing most of the nose on, I put a bit of stuffing in it to make it stick out and sewed the rest of the nose up.


11) Stuff the head full now and stitch up the opening of the head.
12) Use pink thread to sew the head very securely onto the body. I basically used needle and thread to sew a small circle of stitches connecting head to body. Then I went around again making a bigger circle. In the process of sewing the larger circle, I closed the hole on the body that was left from turning and stuffing by stitching up the hole and attaching each stitch to the head as well. Basically, you just need to sew the head on securely however works best for you.


13) Secure eyes on head. I used felt for eyes on the puppy, but you could use buttons as well. (I know . . . I know . . . it seems like it's a little late in the game to put the eyes on, but that's how I roll. I don't even have eyes on the kitty pillow buddy yet. So basically, put the eyes on whenever you want.)


**The kitty's head was made by cutting a triangle like hole in the front face and cutting contrasting fabric in a slightly larger triangle. I pinned and used the sewing machine to sew the triangle shape into the triangle hole. Done! Not too hard either.
I'm going to go celebrate the completion of this tutorial! I'm baffled by two things: 1) that I finished it and 2) that it took me this long to finish it! But I'm done! Woohoo!
Please feel free to e-mail me any questions you have or clarifications you need. I realize that I may not be very clear, so I'm happy to try to help in any way.
Now, go get started on your pillow buddy and don't forget to send me pics when you get done!
Craft on!
I may link this project to these great parties.


35 comments:
I just stumbled across your blog, and I absolutely LOVE these pillow buddies! I want to make one for my daughter now. :)
We have to use our imaginations for the head? I'm out...Just kidding!
I'm so excited about these pillow buddies!! Thanks for being so generous and posting the directions!! Have a great weekend!
You are GOOD Liz! I love this! This just decided it for me...I need to get a sewing machine!!!
SO SO SO happy to have found this tutorial! My little one has been talking non stop about a 'pillow pet' and wants one for her birthday..
I would much rather make one than buy one .. and now I will! THANK YOU!
ps. linking to this post on my blog because I think its GREAT and maybe some of my friends might want to make one too! :)
Thank you for sharing! I'm might try to do one for christmas... :)
hi!
I'm following you now from motivate me mondays :o)
I love your cute creations! Keep creating things, it's good for the soul, and keeps you smiling!
I love this. I might make one for my daughter too..
Please come and follow me back at
www.maisonmarrakech2010.blogspot.com
My bohemian fashion blog.
Best wishes,
Reina
Fashion & Decor designer
omg, so awesome! I am so trying one of these for my nieces birthday (in February lol) It gives me just enough time to complete it!
So cute!! I want to make one :)
Oh I love this! It is so cute. Looks just like the ones you see in stores. Great job!
This is perfect! My daughter has been asking for a Pillow Pet for a while, and I keep thinking, "I should make her one." This will get me on track. Thanks for the tutorial!
How cute and cuddly. My little girl would love one of these.
Oh, that is so, soo cute! I love it :)
I wonder if I could make a guinea pig...
Lamb’s Most Recent Post: Come Link Up! 200th Follower Link Party - You’re Invited!
SO CUTE! Nice to see you at Anything Related! ~Bridgette
that's adorable! I really need to do this for my kids to tag along on trips in the car, etc...
Visiting from justsewsassy.com
So cute!! My girls so want me to make some. Great job and thanks for the tutorial.
YAAAAH i was wondering when someone was going to try and makes these little cutest...love the fabric chose now it's time to go make two for my two little girls thanks for the tut
Amanda
http://patriciaraedesigns.blogspot.com/
That is unbelievably cute! Oh, how I wish I could sew!
Great tutorial! Thanks for the inspiration. You are "sew" creative.
You are officially my hero. I actually tried making something like this for my 4-yr-old. She was excited about it until she saw the pillow pet commercial again and realized how miserably inept my attempt really was! This looks much more like what she wants. :-) Now I just have to decide what kind to make.
Hi There!
I am visiting from The Saturday Standstill. What a great blog idea! And your pillow buddies are super cute :)
Have a great day!
Hi Elizabeth! These are simply adorable! You are so creative - and your kiddies are so lucky to be getting all these handmade gifts! It makes it so much more special. I am featuring this today {stop by and grab a featured button if you like} Thanks so much for joining the Sunday Showcase - I greatly appreciate it! Hope you have a wonderful week. ~ Stephanie Lynn
so cute, just love that pink and brown together! hanks for joining us at "AP Tuesdays!" @ New Nostalgia! Hope to see you again tomorrow!
How adorable! Thanks for linking up to Hoo's got talent!
Looks adorable! Great tutorial!
Thanks for linking up with me for Friday Favorites!
I just stumbled across your blog. The title threw me. I was thinking you literally would do ONLY 12 crafts a year, and you were a novice, but your have a great blog! Your photos are really plentiful and descriptive and really get a good idea of how you are making your craft, and you are doing really difficult items, which is great! Love it, good job. www.tuscanydesign.net/craftbook
canadianblonde
Wow, you're really talented. I love this pillow! :)
These are "so cool" right now! What a great Christmas present for the kids. I am featuring this at somedaycrafts.blogspot.com. Great tutorial.
That is such an awesome project my step kids would love it they're so into the pillow pals now
would love for you to drop by my blog and link up your project sometime next week. I'm hosting a Christmas in July, would love to see you there.
Okay, just finishing up three of these for Christmas. I'm a novice to my sewing machine and the instructions are simple enough even for me. I just have to attach the heads. They are sooo cute. Thanks for making it simple. I did find on another blog how to stitch up the hole on the head without showing your thread. Something like that might be helpful to other beginners like myself.
I have to chuckle at myself because this sounds dumb and like I never get out of the house or in to the world of what's popular. But I googled for a pattern for these because my sister let me know she was making one for her son (our kids are the same age). So of course now I have to make one. ;)
Great tutorial on creating the animal part, but what I was trying to find more so were the pillow measurements (reg pillow size?? is this whole fleece part a cover to a pillow or more like an entire stuffed pet?).
Also, I was hoping for an underside picture. Since I have never gone out to see one at the store, what the heck does the strap part (is that what it is?) look like? Is it just a loose fleece strap with velcro?
Thanks and sorry for the stupidity here... I just haven't gotten to actually handle one so I'm relying on the pics.
What a great idea! I had to take my daughters store bought pillow buddy away (she had a ladybug and would suck on the antenna until is was gross), so i'm gonna try this. Hopefully the ears won't be as alluring as the antenna was.
wow this good but ,I like your post and good pics may be any peoples not like because defrent mind all poeple , pillow pet
Nice articles and your information valuable and good articles thanks for the sharing information Pregnancy Pillow
Post a Comment