Look at this face!

That's the face of a little girl who just had her very first haircut. (That's her say-cheese-I'm-smiling-for-the-camera face. I can't get that girl to smile with her eyes open unless I catch her unaware.) Yep, that's right. She's almost 2 1/2, and she just had her first haircut. I was letting her go for the wild-look . . . until now.


It was here . . . somewhere between the first snip and the last smile, that I was finally inspired to start the sixth craft till Christmas. Monkey was so excited to pick out her very own hair accesories. She picked out one pink ponytail holder, one purple ponytail holder and an orange headband. Actually, I think she would have picked out a few more things if we wouldn't have cut her off after three.

So . . . here in the middle of July, I'm finally announcing my sixth craft till Christmas . . . hair accessories! I'll be doing a variety of hair accessories for the next few weeks and some sort of hair accessory organizer.
I'm starting off with an easy yo-yo button headband. (I made two that they could wear now and I'll be making a few more to stash away for Christmas.)
Yo-Yo Button Headband
What you'll need:
-fabric scraps and felt scraps
-buttons
-flat elastic** or flat elastic headbands
-embroidery thread
**You can either buy your own flat elastic headbands or sew a few up quickly by cutting the appropriate size of flat elastic. Overlapping the ends to form a loop and sewing back and forth a few times across the joined ends.

What you'll do:
1) Cut out two circles of varying colors. One circle will be bigger than the other. I used can lids (because I've been collecting those things like crazy since Iron Crafter).


2) Hand sew a long stitch around the edge of the little circle with the embrodiery thread. Then pull the thread tight to form the yo-yo and tie a small knot. Do the same thing with the big circle, but don't cut the thread or take the needle off the thread.


3) Stack the yo-yos by pushing the needle still attached to the big yo-yo into the center of the little yo-yo. Then slide the button on to the needle and thread stacking it onto the two yo-yos.
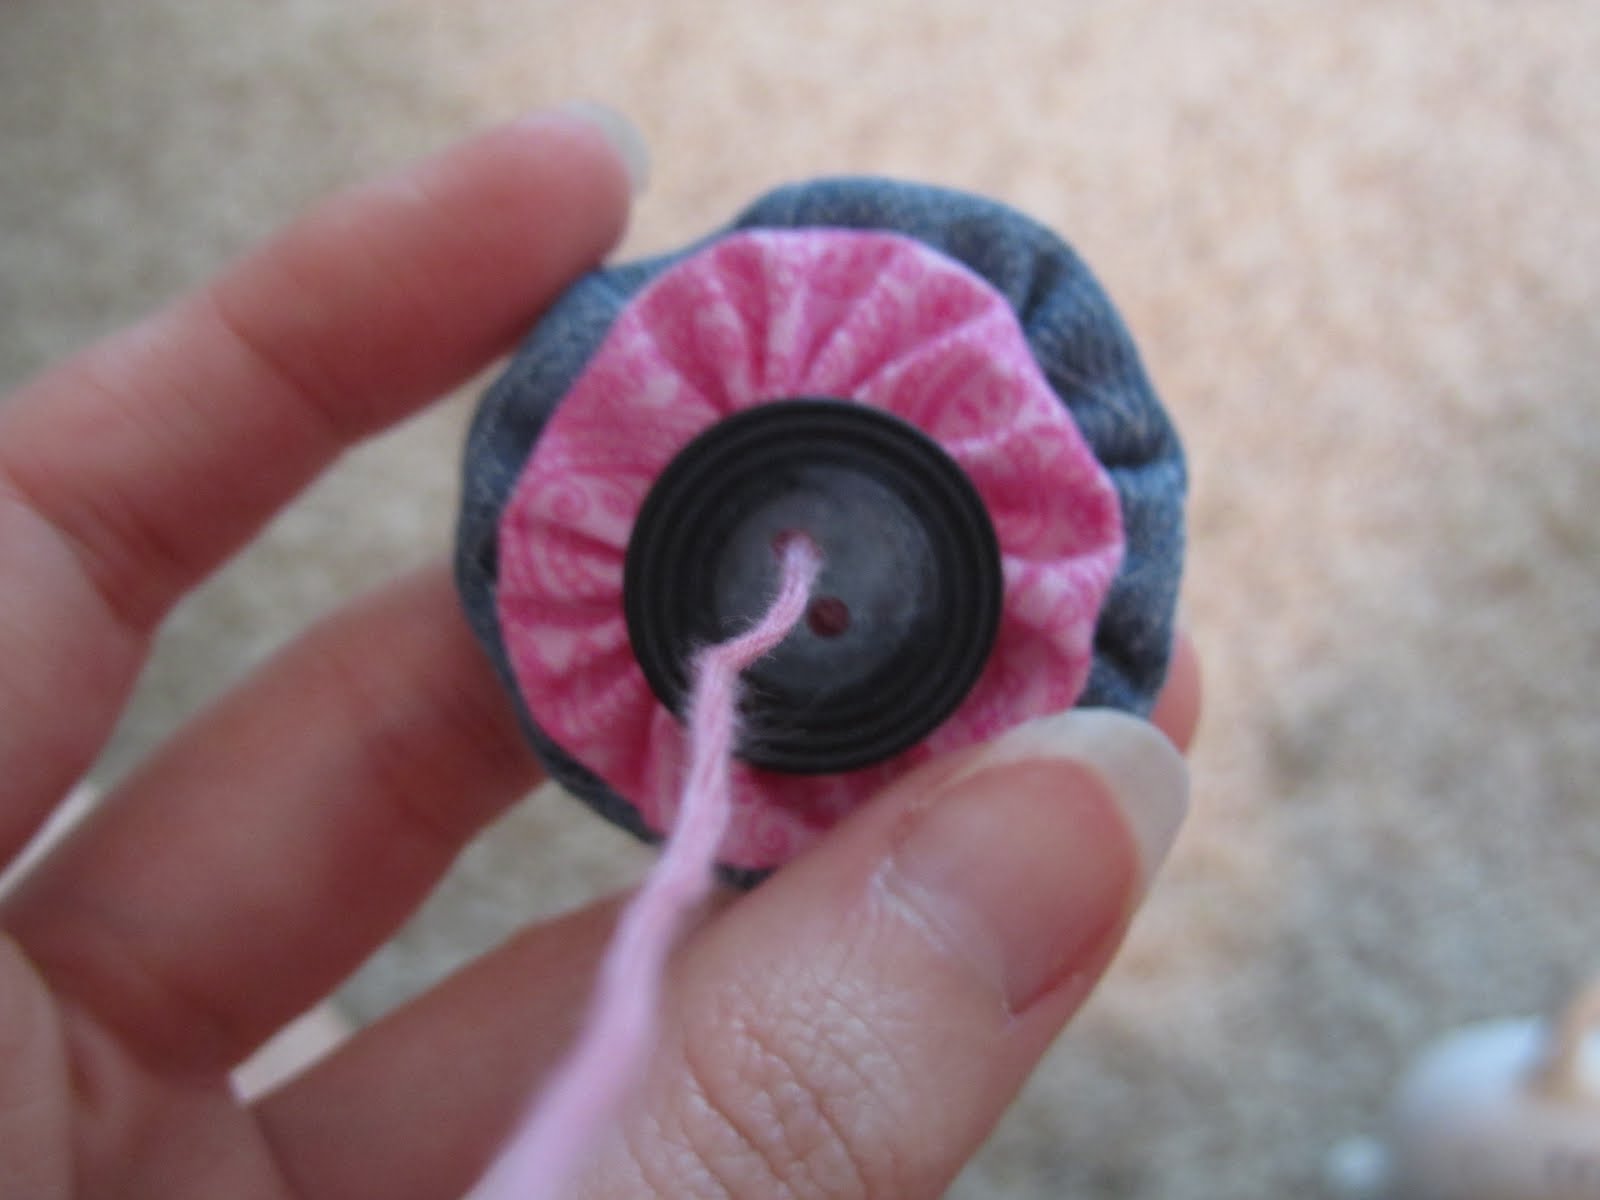
4) Push the needle and thread back down through another hole on the button, both yo-yos and then through an elastic headband. Now sew all these layers together like you are sewing on a button.


5) To finish off, push needle and thread up through elastic and the larger yo-yo. Pull needle out from the center of the big yo-yo. Wrap it around the center of the yo-yo and push needle and thread through fabric and tie a quick knot. Cut thread close to center of yo-you so it can't be seen.

Done!

Here's one done with felt. Rather than two yo-yos I used one yo-yo as the base and cut felt shapes as the middle layer. The technique is exactly the same though.

Super easy and can be done without a sewing machine . . . what could be better?
Hair accessory month continues tomorrow with my guest post over at Fireflies and Jellybeans. I will be sharing my ruffled ribbon headband over there. I'm so nervous but I'm . . .
craft on!


29 comments:
very cool!
I told you it will come to you! :D
we only cut my daughter's hair almost at 3. And it was my husband's, because I didn't have the courage!
Yay, funk over! Cute haircut, how could you not get inspired!
super cute!!! The headband too :)
Fabric flowers are my favorite thing to make right now. You should check out this website.
http://madmim.com/crafts/the-whole-happy-fabric-flower-family-together-forever/
She is soooo cute! My mom is wanting me to trim the top of off Ms. Diva's long mohawk. I can't just trim her hair, she doesn't have enough, LOL!
Cute and clever. I could make a couple of these for my great niece. I love the haircut pics.:-)
Cute, what a great idea for yo-yo's! My little girl will probably get her first hair cut at the end of the summer - and I can't wait. Her hair is almost long enought to put in a pony-tail!
What a cute idea, I might have to try some of these for my girlies!! My oldest was just over two when she had her first hair cut, you're not alone! :)
What adorable photos and I love yo=yos. The one with the denim is my fave.
Glad you got your craft mojo back :)
Hair accessories are a great, quick craft so you can still get heaps done this month. And between felt, fabric, and ribbon, the possibilities are endless! I am currently obsessed with making hair things for my 2 girls - they really are addictive!!!
Ohhh yeah! You're out of the funk!! ;)
And what a cute project. Your pictures are adorable - I love those smiles!
(And woohoo on the blog swap! How awesome is that!)
Adorable! (The little one AND the headbands!)
Super cute! She is a doll!
Ahh she to cute loved the head band!
Your blog awesome!
That's really cute~and you make it look easy, too.
I'll have to make some of these.
Thanks!
Great job, you make it look so easy! What a darling little model you have too:)
Visiting from justsewsassy.com
love the headbands! Thanks for linking @Creative Itch's "Sew Cute Tuesday"!
What adorable headbands for a cute little girl! Thanks for showing us how to make them and joining us at Anything Related!
{Rebekah}
Very cute! What a fun idea, I'm just starting to understand the many uses of them. Thanks for adding another idea to my list.
What a cute idea. Love them!
Adorable as is the cutie wearing them! Thanks for sharing at It's Party Time Thursday at PonyTails&FishScales!
What a great idea! I just did up some yo-yo's tonight to embellish some pacifier clips. I might just make a matching headband now!
What a cutie! Love the use of yo-yo's.
I’m having a new link party “Cheap Thrills Thursday” starting the 29th. It’s for creative ideas that cost under $20. I’d love for you to stop by and join in!
Kat
www.BlackKatsDesign.blogspot.com
Adorable! I've seen yo yo's all around but haven't tried it yet! Thanks for sharing a tutorial, and for linking up to Topsy Turvy Tuesdays!
Cute headbands! I have been having fun making yo-yo headbands too; it's addictive isn't it?! LOL.
Cute pics! Love headbands too! Thanks for linking up for Friday Favorites!
I love the photos you shared especially the little girl's first photo. I just love her sweet smile. Anyway, thanks for sharing this tutorial. I'll try this out and will wait for your more lovely creations. :)
Love this headband--so crafty!
Would love for you to link up to my Headband Link party over at Little Miss Momma! Here's the link:
http://littlemissmomma.blogspot.com/2010/09/headband-week-link-party-and-surprise.html
Love this headband--so crafty!
Would love for you to link up to my Headband Link party over at Little Miss Momma! Here's the link:
http://littlemissmomma.blogspot.com/2010/09/headband-week-link-party-and-surprise.html
Post a Comment